http://www.splutterfish.com/sf/downloads/max/hdri/HDRI_v1.0.1.zip
And if you are using max6, then thank your lucky stars, its already installed for you (isn’t that nice of good old discreet?)
HDRI light probes can be downloaded from
http://www.debevec.org/Probes/
HDRshop can be downloaded from
http://www.debevec.org/HDRShop/
HDRshop is a must have for any 3d enthusiast and also essential for working with HDR images. Although not in this tutorial.. I don’t have time to explain hdr shop nor setting up probe images from mirrored ball to latitude/longitude.
1. OK, firstly, if we are going to make lighting and reflections, we need something to light up and reflect the environment. As you can see from the image below, i have really pushed the boat out and created, not just one sphere, not two or three, but four, and to further advance my cg talents, I’ve also created a plane for my four amazingly complex spheres to sit on. And doesn’t it look spectacular right now? Really the objects aren’t important, since no one really uses HDRI to light 4 spheres anyway, just use the tutorial to light any scene you like.
2. Now that we have our brilliantly creative starting point. Lets create some HDRI reflections.
Firstly, download this - http://www.bfgc.pwp.blueyonder.co.uk/hdri/Apt-probe.hdr
Secondly lets add the reflection map: goto rendering> environment, under background, click the “environment map:” box (its the one that currently says none in it), choose bitmap and then choose the apt-probe that you just downloaded, after you click ok it brings up another window, press ok on this one too. Now, with the environment window still open, open the material editor aswell. Drag and drop the “map #1 (apt-probe.hdr) into a free slot in the materials editor setting it as an instance, and follow the next instructions: -In the “coordinates” rollout, change the mapping type to “spherical environment” (its in the drop down box next to mapping if you get stuck looking), and change the blur to 0.1. now scroll down to the “output” rollout and set the RGB level to 100 (or any number, it really depends how you want you reflections to look).
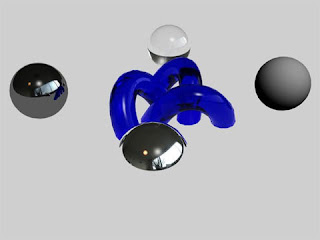
3. Great our shiny objects are now reflecting nicely Lets make some nice lighting. Create a skylight and place it somewhere in the middle of your scene above your objects.
Download http://www.bfgc.pwp.blueyonder.co.uk/hdri/apt-BLRD.hdr and then place it in the “none” box underneath “sky colour” in the modify proerties of the skylight. Do exactly the same as you did for the apt-probe by instancing it into the mats editor and using the same settings as the reflection map. Note: you will have to ensure the “environ” button is checked in the “coordinates” rollout before you can change the mapping to spherical environment render, and there you have it.. HDRI.


